
Secure WordPress Hosting: 20 Security Tips

Your WordPress site is only as secure as its weakest plugin, password, or host — and attackers probe for all three around the clock.
What is WordPress security?
WordPress security is the practice of hardening a website against attacks: keeping WordPress core, themes, and plugins updated, using strong authentication, running a web application firewall (WAF), backing up regularly, scanning for malware, and choosing a host that builds those protections in. Layer enough of these defenses, and most attackers move on to an easier target.
The 20 tips in this guide boil down to four moves:
- Lock down logins – Strong passwords, two-factor authentication, limited login attempts, and a hidden, password-protected login page.
- Keep everything updated – WordPress core, themes, plugins, and PHP, with careful vetting before you install anything new.
- Add protective layers – A WAF, malware scanning, tight file permissions, minimal user accounts, and a custom database prefix.
- Choose secure WordPress hosting – A host that bundles a firewall, automated backups, and automatic updates handles much of this list for you.
WordPress is an excellent, secure platform out of the box, but there’s certainly more you can (and should!) do to keep your site safe from malicious intent. Many of these security enhancements are easy to implement and can be performed manually in mere minutes. Others simply require installing a particular plugin.
In this article, I’ll guide you through 20 different strategies for upping the defenses on your WordPress fortress. But first, let’s go a little further into why website security should matter to you.
Why WordPress security is so important
Choosing WordPress as your platform is an excellent way to start when you’re trying to create a site. It’s not only a flexible, powerful platform for building websites — it’s also secure as is.
But of course, no platform can be 100% secure, and there are many reasons to be concerned about the security of your WordPress site:
- Popularity – WordPress powers a huge portion of all the websites on the internet, making it a prime target for cybercriminals. Its widespread usage makes it an attractive platform to exploit vulnerabilities and gain unauthorized access to websites.
- Vulnerabilities – As with any software, WordPress is not immune to vulnerabilities. Hackers constantly search for vulnerabilities in WordPress themes, plugins, and core software. Exploiting them can lead to unauthorized access, data breaches, defacement, or even complete control of a website.
- Data breaches – WordPress websites often store sensitive user information, like email addresses, passwords, and personal data. A security breach can expose this confidential data, leading to identity theft, financial loss, or even legal consequences (yikes!).
- SEO impact – A compromised WordPress site can be used for malicious activities, like hosting malware, redirecting visitors to harmful websites, or sending spam emails. Search engines may flag and penalize such websites, leading to a significant drop in rankings and organic traffic once you regain control of your site.
- Reputation and trust – If a WordPress website is compromised and used for malicious purposes, it can severely damage the site owner’s reputation and erode user trust. Think of an e-commerce store, for example. If the store can’t commit to keeping shoppers’ personal data safe, people just won’t shop there (and who can blame them?).
- Downtime and financial loss – A hacked site can experience extended downtime while the website owner works to resolve the security breach. In turn, downtime can result in lost business, decreased revenue, and additional expenses for recovery and restoration.
Given these risks, investing in WordPress security measures is essential to protect your website and its users’ data. Ideally, you should put just as much time and effort into security as you spent designing your site in the first place (if not more). Fortunately for you, dear reader, there are lots of simple, quick ways to improve your site’s security, as well as some more complex techniques you may want to employ — and below, we’re covering them all.
Top WordPress security vulnerabilities
As the saying goes, know thy enemy. Before we dive into our security tips, let’s learn more about the security vulnerabilities you need to protect your WordPress site from.
- Outdated software, themes, and plugins – Using outdated versions of WordPress, themes, or plugins can leave your site vulnerable to known security flaws.
- Weak usernames and passwords – Weak login credentials make it easier for hackers to access your site. Avoid using common usernames like “admin” and choose strong, unique passwords that include a combination of letters, numbers, and symbols.
- Brute force attacks – Brute force attacks involve repeated attempts to guess your login credentials. You can prevent them by limiting login attempts and using two-factor authentication (more on that later in this article).
- Cross-site scripting (XSS) – XSS vulnerabilities happen when malicious scripts are injected into web pages, potentially compromising users’ browsers or session data. Many security plugins have features to prevent XSS.
- SQL injection – Attackers insert malicious commands into form fields or URLs to manipulate your site’s database — a successful SQL injection attack can read, modify, or delete stored data, per OWASP. Keeping software updated and using a WAF helps block injection attempts.
- Malware infections – Malware can be injected into your site through vulnerabilities, infected themes or plugins, or compromised files. To avoid malware, don’t install plugins without checking into their reputation first. And regular malware scanning can catch infections before they have the chance to wreak havoc on your site.
- Backdoors – A backdoor is a hidden entry point in a website that allows unauthorized access even after security measures are in place. Backdoors can be created by malicious actors or accidentally introduced through compromised themes, plugins, or weak security practices. Once a backdoor is established, it can grant unauthorized access to an attacker, who can then manipulate the site, steal data, or perform other malicious activities without the website owner’s knowledge.
Implementing security plugins and other best practices can protect your site from these vulnerabilities. One of the biggest levers, though, is where your site lives — so let’s start with what secure WordPress hosting looks like, then get into the tips themselves.
What to look for in secure WordPress hosting
Secure WordPress hosting pairs your own hardening work with protections the host runs for you: a web application firewall (WAF), malware scanning (and cleanup when something slips through), DDoS mitigation, free SSL certificates, automated backups, encrypted SFTP/SSH access, automatic updates, and 24/7 support. Here’s the checklist, and how DreamHost covers each item:
Any host worth your money should clear most of this table (see DreamHost’s security features for the full rundown). One honest caveat: at DreamHost, malware scanning (DreamShield) and hands-on cleanup (DreamCare) are separate paid services rather than part of the base plans. Everything else on the list comes standard, and DreamPress, DreamHost’s managed WordPress hosting, layers on offsite daily backups and expert support — more on that in the first tip below.
20 WordPress security tips
Hopefully, I’ve convinced you about the importance of maintaining a secure WordPress website. If not, I’m going to have to re-enroll in Persuasive Writing 101. Please don’t make me do that.
Throughout the rest of this article, I’ll introduce 20 strategies (along with some of the best WordPress security plugins) for making your site safer from some of the most common and dangerous security vulnerabilities. You don’t have to implement every suggestion on this list (although you certainly can!), but the more steps you take to secure your site, the lower your chances of encountering a disaster down the road.
1. Choose secure WordPress hosting
What makes a WordPress host secure? A web application firewall, SSL/TLS certificates, DDoS protection, automated backups, malware scanning, and automatic updates — the protections in the checklist above, which stop most attacks before they ever reach your site. Choose a host that covers them, and a big chunk of this list is handled before you touch a single setting.
You can think of your web host as your website’s street on the internet — it’s the place where your site “lives.” And like a good school district matters to your kid’s future (so they say; I turned out fine), the quality of your website’s home base counts in a lot of big ways.
A solid hosting provider can impact how well your site performs, how reliable it is, how large it can grow, and even how it ranks in search engines. The best hosts offer a variety of useful features, excellent support, and a service tailored to your chosen platform.
How web hosting can improve WordPress security:
- A quality host will constantly update its service, software, and tools to respond to the latest threats and eliminate potential security breaches.
- Web hosts often offer various targeted security features, such as SSL/TLS certificates and DDoS protection. You should also get access to a Web Application Firewall (WAF), which will help monitor and block serious threats to your site.
- Your web host will most likely provide a way to back up your site (in some cases, even carrying out real-time backups for you), so if you’re hacked, you can easily revert to a stable, previous version.
- If your host offers reliable, 24/7 support, you’ll always have someone to help you out if you do run into a security-related issue.
This list should give you a good starting point to work from when looking for a host for your new site. You’ll want to find one that covers the security checklist above, plus has a reputation for reliability and excellent performance.
DreamPress is a managed WordPress hosting service that’s fast, reliable, scalable, and, of course, secure. DreamPress includes a pre-installed SSL/TLS certificate, plus the web application and network firewalls that DreamHost includes with every plan to block malicious traffic. Every DreamPress plan also comes with automated daily backups stored offsite, professional site migration, and 24/7 support from in-house WordPress experts.
Jetpack
Jetpack is a WordPress plugin created by Automattic, the company behind WordPress.com. It’s a plugin that gives you access to features that are usually only available on WordPress.com sites.
Read More
With DreamPress, you’ll be able to rest easy knowing that your site is protected. Our hosting service even takes care of many of the other security-enhancing steps on this list — although we still encourage you to read on to learn what extra measures (and plugins like Jetpack) you can add on top.
2. Register your domain privately
To register a domain, you’re asked to provide your name, address, and phone number. This information is used to track ownership of domain names and can be found online with a quick search on the WHOIS directory.
While keeping track of this information is vital to the health of the internet, it’s reasonable not to want your personal information online. This is where Private Registration enters the story. When you register a domain with DreamHost (or another secure hosting platform, I guess), you have the option to substitute your personal information with the relevant data from the hosting platform — so looking up your domain on WHOIS shows DreamHost’s address and contact information instead of yours. You can even enable this security feature after your domain has already been registered!
3. Change your admin username
When you first create your website, all shiny and new, you’re given a User Profile. At any time, you can go back and change your Nickname or fill in your Full Name, but to change your username is a different story — you will need to create a whole new user and grant that account the administrator role. The drawback? You need to use a different email address than the one used by your current account.
You can then alter your username by creating a new user, giving it the administrator role, attributing all your content to it, and deleting your original account. When your previous username has been deleted, you can change the email address of your new account if you desire.
4. Enable a web application firewall
Every DreamHost plan includes web application and network firewalls that block malicious traffic, with no additional setup or fees. DreamHost also offers DreamShield, a paid malware scanning add-on: enable it on your hosting account, and DreamHost scans your site daily for malicious code and notifies you immediately via email if anything suspicious turns up.
You’re probably familiar with the concept of a firewall — a program that helps to block all sorts of unwanted attacks on your site. Most likely, you have some kind of firewall on your computer. A Web Application Firewall (WAF) is simply a firewall designed specifically for websites. It can protect servers, specific websites, or entire groups of sites.
A WAF on your WordPress site will function as a barrier between your website and the rest of the web. A firewall monitors incoming activity, detects attacks, malware, and other unwanted events, and blocks anything it considers a risk from accessing your web server. #winning
Want an extra layer at the application level? You have many options for adding a WAF plugin to your site (Wordfence is a popular choice) — just check what your host already provides before installing anything extra.
5. Implement two-factor authentication
Two-factor authentication (which also goes by two-step authentication and a variety of other, similar names) refers to a two-step process you’ll need to follow when logging into your site. This takes a little more time and effort but goes a long way toward keeping hackers out.
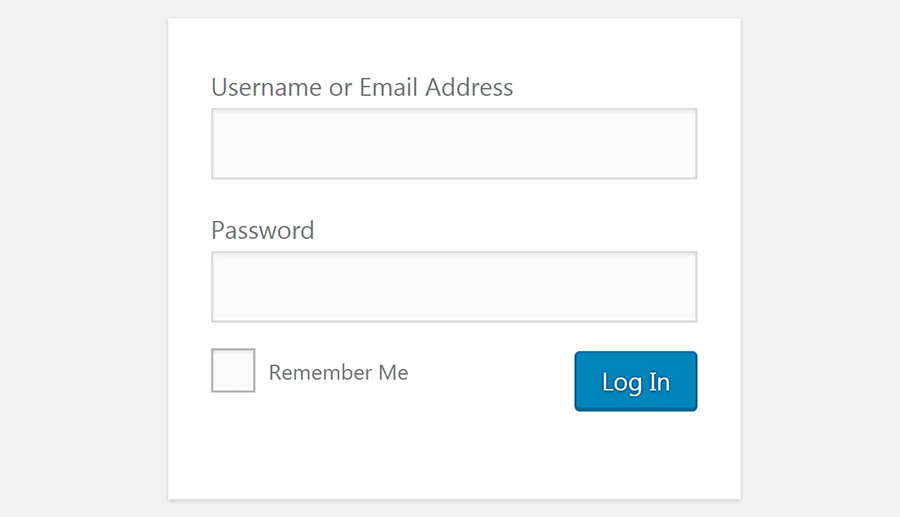
Two-factor authentication involves using a smartphone or other device to verify your login. First, you’ll visit your WordPress site and enter your username and password as usual. A unique code will then be sent to your mobile device, which you must provide to finish logging in. This enables you to prove your identity by showing you have access to something solely yours, such as a particular phone or tablet.
As with many WordPress features, two-factor authentication is easy to add with a dedicated plugin. The Two Factor Authentication plugin is a solid choice; it’s created by reliable developers, compatible with Google Authenticator, and will enable you to add two-factor functionality to your site with no fuss.
Another choice is the Two-Factor plugin, published by WordPress.org, which supports authenticator apps (TOTP), email codes, and backup codes. As with any plugin in this category, it comes with a bit of a learning curve, but it will get the job done and is incredibly secure.
Whatever route you choose, make sure to plan ahead with your team, since you’ll need to gather phone numbers and other information for all user accounts. With that, your login page is now secured and ready to go.
6. Be mindful when adding new plugins and themes
One of the best things about WordPress is the ready availability of plugins and themes for just about any need. With these handy tools, you can make your site look just right and add nearly any feature or functionality you can think of.
Not all plugins and themes are created equally, though.
Developers who aren’t careful or don’t have the right level of experience can create plugins that are unreliable, insecure, or just downright sucky. They might use poor coding practices that leave holes hackers can easily exploit or unknowingly interfere with crucial functionality.
This means you must be very careful about the themes and plugins you add to your site. Each one should be vetted to ensure it’s a solid option that won’t hurt your site or cause problems. Here’s how to select quality tools:
- Read reviews – Check user ratings and reviews to learn whether others have had a good experience with the plugin or theme.
- Developer support – Look at how recently the plugin or theme has been updated. If it’s been longer than six months, chances are it isn’t as secure as it could be.
- Easy does it – Install new plugins and themes one at a time, so if anything goes wrong, you’ll know what the cause was. Also, remember to back up your site before adding anything to it.
- Vetted sources – Get your plugins and themes from trustworthy sources, such as the WordPress.org Theme and Plugin Directories, ThemeForest and CodeCanyon, and reliable developer websites.
7. Regularly update WordPress
Keeping WordPress up to date is one of the most important things you can do to secure your site. Smaller patches and security updates will be implemented automatically, but you may need to approve major updates independently (don’t worry, this is very simple to do). This probably goes without saying, but DreamHost handles these updates for you, so you don’t have to worry.
But your work isn’t done just because WordPress is up to date.
You’ll also need to regularly update your plugins, themes, and other WordPress installations to ensure they work well together and are secured against the latest threats. Fortunately, this is also pretty easy — simply go to your WordPress dashboard, look for the red notifications telling you there are themes or plugins with available updates, and click “Update Now” next to each one. Before applying a major update to a live site, test it on a staging copy first — many managed hosts include one, and DreamPress comes with 1-click staging.
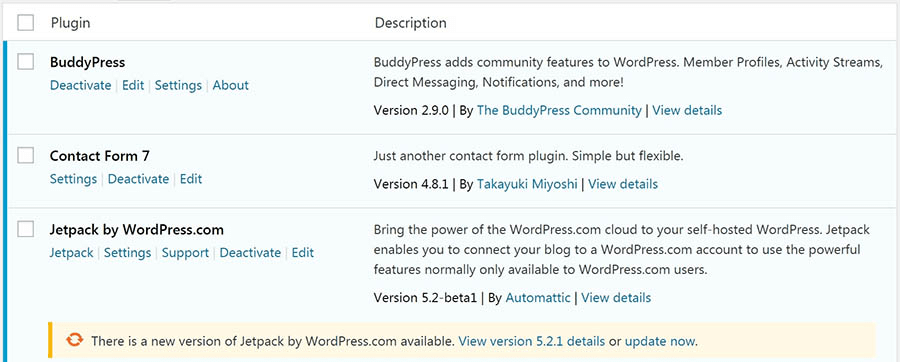
You can also update your plugins in a batch by selecting all of them and then hitting the update button, either here or in the WordPress panel.
8. Configure file permissions
Let’s talk technical for a minute.
One ground rule before you dig in: whenever you connect to your site’s files, use SFTP or SSH rather than plain FTP. Encrypted connections protect your login credentials and file transfers from being intercepted, and DreamHost includes secure SFTP and SSH access with its hosting plans.
A lot of the information, data, and content on your WordPress site is stored in a series of folders and files on its back end. These are organized into a hierarchical structure, and each one is given a permissions level. The permissions on a WordPress file or folder determine who can view and edit it. They can be set to allow access to anyone, only you, or almost anything in between.
File permissions are represented by a three-digit number in WordPress, and each digit has a meaning. The first digit stands for an individual user (the site’s owner), the second digit for the group (for example, members of your site), and the third for everyone in the world. The number itself means that the user, group, or world:
- 0: Has no access to the file.
- 1: Can only execute the file.
- 2: Can edit the file.
- 3: Can edit and execute the file.
- 4: Can read the file.
- 5: Can read and execute the file.
- 6: Can read and edit the file.
- 7: Can read, edit, and execute the file.
So, for example, if a file is given a permissions level of 640, it means the primary user can read and edit the file, the group can read the file but not edit it, and the rest of the world cannot access it at all. It’s important to ensure that each person only has the level of access to your site’s files and folders you want them to have.
WordPress recommends setting folders to a permissions level of 755 and files to 644. You’re pretty safe sticking to these guidelines, although you can set up any combination you’d like. Just remember that it’s best not to give anyone more access than they absolutely need, especially to core files.
You should also keep in mind that your ideal permissions settings will depend somewhat on your hosting service, so you may want to find out what your host recommends.
Note: Be very careful when making changes to your permissions levels — choosing the wrong values (like the dreaded 777) can make your site inaccessible.
And while we’re on this subject, it’s important to note that WordPress comes with a built-in code editor that allows users to edit theme and plugin files right from the Admin Area. This is handy when you need it, but a big security risk if your site falls into the wrong hands. That’s why you should disable file editing with a plugin like Sucuri.
9. Keep WordPress users to a minimum
If you’re running your WordPress site solo, you don’t need to worry about this step. Just don’t give anyone else an account on your site, and you’ll be the only person who can make changes.
However, there are many reasons to add another user account to your site: You may want to let other authors contribute content, or you might need people to help edit content and manage your site. You may even have an entire team of users who regularly access your WordPress site and make their own changes.
This can be beneficial (or even necessary). However, it’s also a potential security risk.
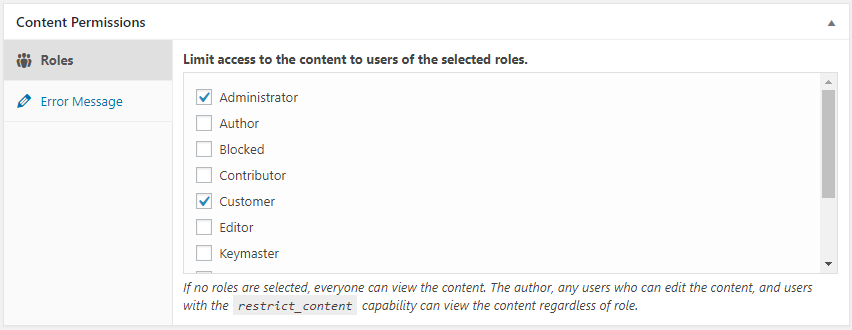
The more people you let into your site, the higher the chance that someone will make a mistake, cause problems, or just be a putz. That’s why you should keep your site’s user count as low as possible without hampering its ability to grow. In particular, try to limit the number of administrators and other user roles with high privileges.
User Role
Users in WordPress can be one of six default roles: Super Admin, Administrator, Editor, Author, Contributor, or Subscriber. WordPress provides a user role management system that defines what users are allowed to do on your website.
Read More
Here are a few other best practices:
- Limit each user to only what permissions are necessary for them to do their job.
- Encourage users to use strong passwords.
- Try to stick with one administrator and a small group of editors.
- Remove users who have left the site or no longer need access.
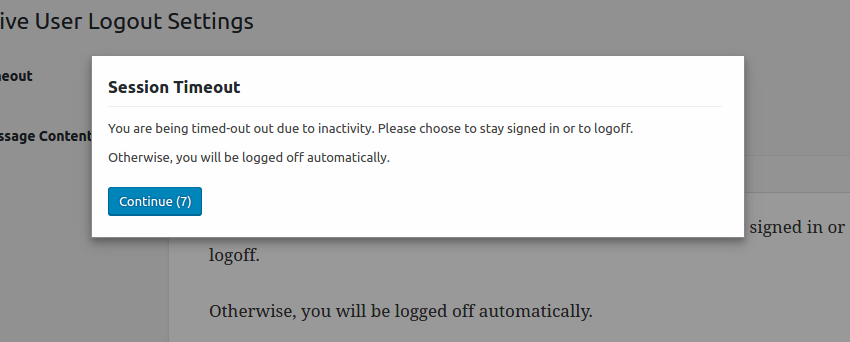
- Regularly log out idle users (the Inactive Logout plugin is great for this!).
- Consider downloading a plugin like Members, which provides a user interface for WordPress’ role and capabilities system.
10. Limit login attempts
Everyone forgets their password sometimes. But good news! By default, WordPress allows an unlimited number of guesses.
But is that really good news? Brute force attacks, or attacks where a hacker tries any number of passwords, are one of the most common ways hackers gain access to private accounts. With no limit on login attempts, a hacker or bot could try every password in the book with no consequences.
First, check your Web Application Firewall (WAF) to limit the number of login attempts a user can make. If your firewall is already set up, a limit will already be in place, but you can also use a separate plugin for that! Both Login Lockdown and Limit Login Attempts Security (formerly Limit Login Attempts Reloaded, by WPChef) record the IP address and time stamp for each failed login attempt, let you limit the number of failed attempts allowed in a certain span of time, and lock out IP addresses that exceed the limit. Both plugins are free, but Login Lockdown is simpler and more beginner-friendly. If you need a more full-featured system, Limit Login Attempts Security is the way to go, allowing not only IP safelisting and denylisting, but also notifying admins if a certain number of lockouts is reached.
11. Track your admin area activity
If you have multiple users, keeping tabs on what they’re all doing on the site is a good idea. Tracking activity in your WordPress admin area will help you spot when other users are doing things they shouldn’t — and can help you spot when unauthorized users have gained access.
But you also need a tool to help you see who is behind different site activities — like when someone makes an unauthorized change or a suspicious new install. For that, you need another plugin. Simple History lives up to its name by creating a simple, easy-to-understand log of changes and events on your site.
For more comprehensive tracking features, check out WP Activity Log (formerly WP Security Audit Log), which tracks just about everything that happens on your site and offers a premium edition.
12. Password protect your login page
The login page is the most likely way for hackers to access your website, so protecting it is a great way to protect the rest of your site. This can be a bit technical, but it’s still worth learning. Use this tutorial to learn how to create a .htaccess file and add a password prompt to your login page. A login for your login — what will they think of next?
And if you’re hosting content that not everyone needs to see, you can password protect other parts of your site. For blog posts and other pages, you can add password protection by going to Posts >> All Posts. Click “edit,” and you’ll see the option to change the visibility to “Password Protected.” Just publish, and badabing-badaboom, that page is locked up tight!
13. Hide your login page
Adding password protection to your login page is great, but even better is if hackers can’t even find it. Changing your wp-admin and wp-login pages is easy and helps deter hackers who can easily find your login page if you leave default settings in place.
There are several plugins that can redirect the default login page to another page of your choosing. Many plugins offer this as part of a larger package (for example, Defender also includes a malware scanner and firewall). But if you’re looking for something simple, try WPS Hide Login, which just hides your login. Just don’t forget to bookmark your new login page so you can find it.
14. Update PHP
Just like America runs on Dunkin’ (don’t quote us there), WordPress runs on PHP. Updating WordPress isn’t enough to keep your site safe and secure — you need to make sure you’re using the latest version of PHP, too.
Normally, each PHP version is supported for at least two years after its release date, meaning vulnerabilities are addressed by the engineers who designed the code. When the code goes out of date (or reaches its EOL or “end of life”), it’s time to upgrade, or you risk being exposed to security concerns, performance slowdowns, and bugs galore.
To see which version of PHP you’re currently running, log in to your WordPress site, and select Tools >> Site Health. Navigate to Info and then Server, and view your current PHP version.
15. Secure your WordPress database
Leaving anything at the default settings is a boon for hackers, and by default, WordPress uses wp_ as the prefix for all of your related tables. Good news! If you’re using the DreamHost WordPress installer, you already have a prefix of random letters and numbers. As long as it ends with an underscore, the system is happy. Better news! Even if your WordPress is already installed, it may be eligible for the DreamHost WordPress installer as long as the site is fully hosted and meets a few other guidelines.
Just note that breaking something can be as easy as a missing underscore. Luckily, there is a default version of the wp-config.php file available at WordPress Core, so you can quickly and easily rebuild — whether you tried to change the database prefix manually, or with a service like phpMyAdmin.
16. Skip security questions (use stronger login protection instead)
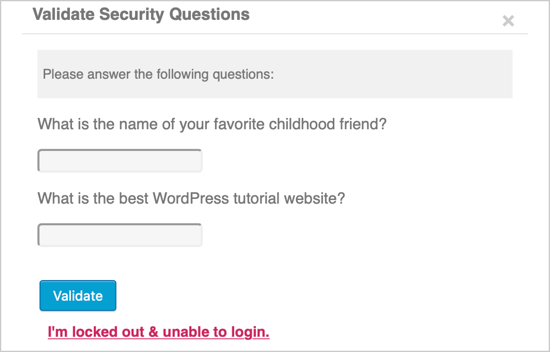
Security questions used to be a staple of guides like this one, and plugins that add them to your WordPress login screen still exist. Current guidance says to skip them: knowledge-based questions like “What was the name of your first pet?” don’t appear among the acceptable authenticators in NIST’s Digital Identity Guidelines (SP 800-63B), because the answers are too easy to guess, research, or phish.
Put that energy into login protections that hold up instead: a strong, unique password, two-factor authentication (tip #5), and limited login attempts (tip #10).
17. Hide your WordPress version
Security through Obscurity — if they can’t find it, they can’t hack it!
Hide which version of WordPress you’re using (or hide that you’re using WordPress altogether) by altering the header code. If that sounds too technical, use a plugin like WPCode. Just make sure to alter the code instead of just editing the theme settings, as those changes will be overwritten during the next theme update.
18. Prevent hotlinking
Hotlinking is the act of stealing bandwidth by using files hosted on one site and linking them to another. For example, let’s say someone draws a pretty clever comic, and some other website wants to feature it without permission. They could hotlink the comic instead of hosting it on their own servers, costing the original website more bandwidth, and therefore more money.
To prevent hotlinking, you can choose to reject certain domains, allow only certain domains, or remove the ability to hotlink altogether, all by making a few changes to your .htaccess file. You can even include a snippet in your .htaccess file that routes all hotlinking attempts to a page or image of your choice — perhaps one that says, “Stop hotlinking, freeloader!”
19. DDoS protection (disable XML-RPC)
DDoS protection is any defense that keeps a flood of junk traffic from overwhelming your site and knocking it offline. If you host with DreamHost, the network-level work is already done: every DreamHost plan includes DDoS protection and mitigation, backed by 24/7 server and network monitoring. There are still a couple of things you can do on your end to shrink the attack surface.
A Distributed Denial of Service attack (or DDoS) is when a hacker uses multiple systems to send a huge volume of data and overwhelm their target. This can slow down and crash their target — imagine a huge traffic jam for your website where no legitimate traffic can get in.
Patience is hard to come by online: in Google’s The Need for Mobile Speed research (2016), 53% of mobile site visits were abandoned when a page took longer than 3 seconds to load. The sooner you can identify and resolve an attack on your website, the better.
While preventing a DDoS attack may seem daunting, one of the first steps you can take is to remove or disable any old or unused plugins. Plugins are incredibly handy, but by increasing functionality, they also have access to your website that can be exploited. For once, downloading more plugins is not the answer!
XML-RPC allows WordPress access through the app on your mobile device. If you don’t use your smartphone to make changes to your WordPress website, you likely don’t need this feature enabled. Turning it off involves adding a quick snippet of code to your .htaccess file, and you’ll be all the safer for it.
20. Malware scanning
Malware (short for malicious software) hides in what appears to be safe applications so that the user doesn’t know their computer or website has been infected.
Malware scanning is an important defense that works by using anti-malware software to identify and isolate suspicious files until you decide if they need to be removed. If a threat is detected, a good malware scanner will delete any trace of it from your computer ASAP. Luckily, several firewall plugins come with malware scanning built in, so make sure to check your security plugins to see what they offer.
Detection is only half the job, though. If a scan finds an infection, cleanup means identifying every compromised file, removing the malicious code (including any backdoors), and restoring from a clean backup where needed. Some hosts and security services include hack remediation while others charge extra for it, so check before you need it — DreamHost’s DreamCare service, a separate paid offering, includes proactive hacked-site repair.
If you have DreamHost as your hosting platform, you can add DreamShield, a paid security add-on, to handle daily malware scanning for you.
WordPress security FAQs
Is WordPress secure out of the box?
Yes — the WordPress core software is actively maintained and receives regular security patches. Most compromises come through outdated plugins and themes, weak credentials, or insecure hosting. Keep everything updated, use strong authentication, and choose a security-focused host to cover the gaps.
Does DreamHost include a firewall?
Yes. Every DreamHost plan includes web application and network firewalls that block malicious traffic and protect against common cyber threats, with no additional setup or fees.
Does DreamHost offer DDoS protection?
Yes. Every DreamHost plan includes DDoS protection and mitigation, backed by 24/7 server and network monitoring. On your end, disabling XML-RPC and removing unused plugins shrinks your site’s attack surface even further.
How do I scan my WordPress site for malware?
Use a malware scanner. Many WordPress security plugins include one, or DreamHost customers can enable the paid DreamShield add-on, which scans your site daily for malicious code and sends an alert the moment it finds anything suspicious.
What is the most secure hosting for WordPress?
The most secure WordPress hosting includes a WAF, malware scanning and cleanup, DDoS mitigation, free SSL, automated backups, and automatic updates. Compare managed plans (like DreamPress) on those features, and check which protections are included and which cost extra.
WordPress security: locking it up
If your website is hacked, you’ll spend hours (perhaps even days) trying to repair the damage. You may permanently lose data or see your personal information compromised — or worse: your clients’ data.
That’s why you have to put enough time and energy into making sure your site is secure. Otherwise, you just risk losing valuable business and precious time.
These WordPress security tips should help. Some are simple tweaks, while others affect your entire site. But if you’re looking for one impactful change you can make today to keep your site secure, make sure it runs on a secured WordPress host.
DreamPress hosting (with free WordPress migration) is specifically designed for the WordPress environment. Plus, if you ever do encounter a security issue, we’ve got you covered with automatic daily backups, optional daily malware scanning through the DreamShield add-on, and our support team of WordPress experts! Ready to protect your site from threats and vulnerabilities? Learn more about DreamPress hosting today.

Launch Your Website with DreamPress
Our automatic updates and strong security defenses take server management off your hands so you can focus on creating a great website.
Check Out Plans
Did you enjoy this article?
